I have done torch fired enameling from time to time, which is really fun and easy -- with the added benefit of instant gratification. I've always had in my mind a picture of a series of enamel tiles like quilt squares, and I took this class as the opportunity to explore this concept.
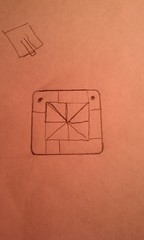
I started with a simple sketch of how I might want my finished piece to look. I chose a pinwheel pattern, which is also the first kind of quilt (and ONLY kind of quilt!) I've ever made. Next up, blank copper piece, cleaned it well and drilled in holes for easy hanging as a pendant later. Then I laid down a base color on both sides.
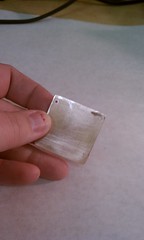

Next, I cut my thin fine silver cloisonne wires and laid them in the pattern. I didn't bother any measuring, so my pendant is not nearly so rigidly squarish -- already going astray from my sketch, which was fine by me!
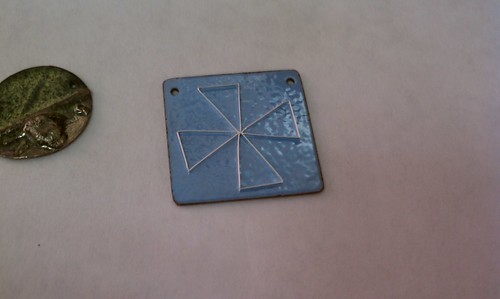
Then I started laying in the colored enamels. The red is opaque, and I just piled it in willy nilly. The other areas, in between the reds are transparents - gray near the middle, bluish turquoise near the outside. These I brushed on little by little, firing in between each application.

This is how far my pendant has come - I'll be working on it some more next week!
I've also been fiddling around a lot - just playing and experimenting.
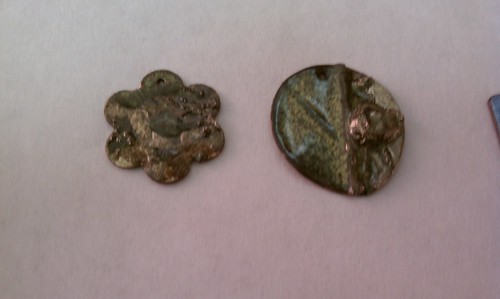
I can't remember the name for this, but it is a really cool word. A layer of enamel goes down (usually counter, or leftover enamel because the color doesn't matter). Then you pile on some scrap silver, and fire the heck out of it all. As far as I understand (and I may be getting this all wrong) the oxides from the base copper come up through the enamel, the sterling mixes with the oxides and the enamel, and it all turns into this lovely messy disorganized awesomeness. Seriously, it looks like the terrain of a strange new planet. After it does it's magic in the kiln, it needs a quick buff with a brass wheel to bring out the gloss and green tinge.
I've also just been laying down some color - opaque and transparent alike.
This piece started as a dark blue torch fired enamel copper circle. I pulled it out of my little sample bin and started painting more enamel on top. I was thinking of the upcoming spring equinox as I played. The spring equinox (which will be on march 20th this year) marks when the sun comes directly over the equator and there will be equal daylight hours and nighttime hours -- which means the daylight hours will start to become longer as we head out of winter (YAY).

That's it for me - I'll post again with the rest of my enameling progress, so stay tuned :)
Amy from rainestudios.net
4 comments:
Great progression, Amy! Love it! I ordered a small kiln (less than $200) that's bigger than a PMC kiln (researched it for a while) and hotter. Haven't used it yet- need to order some enamel! Maybe we should pool our resources!
Link, Dana, link! I need to ponder and pore over the details of the kiln sadistically before I fervently tell myself I can't get it!
You're a girl after my own heart, Amy! Here's the link:
http://www.cooltools.us/Amaco-FA5E-Enameling-Kiln-p/kln-710.htm
never tried enamel, do you have to wear a big mask thingie? I love the quilt piece, really liked the blue dot with white
Post a Comment