So today we brave Ladysmith Warriors met at Dana's house to try our hand AGAIN at torch-fired enameling. Not for the faint of heart! Not many of us are very educated, so it was a bit of a blind-leading-blind exercise. We did have one member who led the way for us- thank you Ellen K.!!! Without you it would've been a total disaster!!!

We had an interest in trying our hand at using pre-printed enamel decals. We saw an article about it here that intrigued us:
So we ordered enamel decals from Delphi Glass (http://www.delphiglass.com)
Below is one of the sheets purchased:

These decals utilize a water-glide paper and are printed with enamel 'dyes'. Below- I traced and cut out heart-shaped pieces. I soaked the decals in water to release the top printed layer and placed them on top of the enameled hearts that I'd already enameled. I let them dry on a cup warmer for 15 minutes then torch-fired.

I topped them with a clear enamel layer and fired again to seal in the decal. Yay!!

Besides the pre-printed decals, we bought sheets of water-glide paper and printed our own decals. The success of this technique depends on the amount of iron present in your laser printer toner cartridge. Unfortunately, mine had little iron because in the 2 decals I attempted to fire, neither worked. You can see in the below example a dark area in the center where the decals were torched as well as a decal from the pre-printed ones we purchased, which obviously worked fine.

We also bought white decals which we fired on top of pre-enameled pieces, but they weren't as good as the black decals.

We also bought dichroic paper which we tried firing- here's an article about how to do it:
Here's what the scraps of dichro paper look like- we used punches to cut out shapes:

There is a color-shift to these that the camera can't capture. Below is a piece fired with some diamond-shaped pieces. A clear layer was fired over the dichro which adds to the permanence but diminishes the effect of the dichro color-shift.

Below are a series of pieces Bodil enameled and fired - she used all kinds of decals:
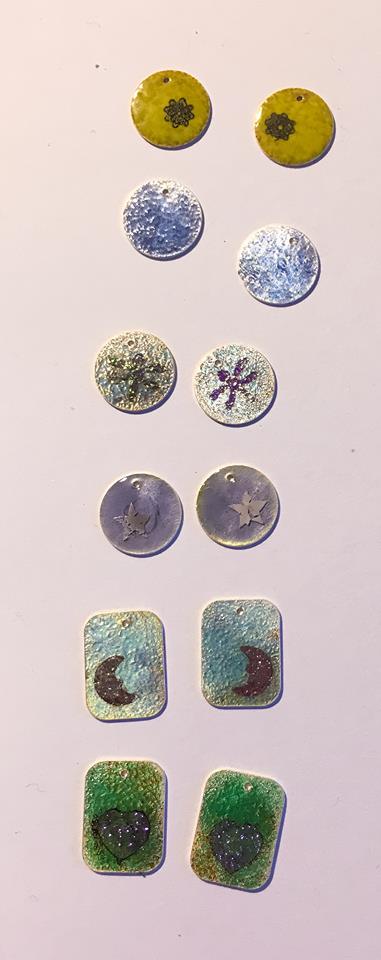
Fun!!!
And of course we did some 'regular' torch-fired enameling. We had a number of first-time enamelers. Below is a piece of Ann's- she saw-cut the floral piece and enameled several layers of enamel.

Odaybea also tried enameling today- brought some discs and washers and tried a few techniques- layering and embedding wires, and sgraffito:

Karina also was a new enameler, and she brought some skull cut-outs to enamel. She left happy with these- they came out great:

Sonia had some fold-formed pieces and was playing with layering color:

Dana used stencils to sift patterns:

And Ellen K. used a wire to create a bezel to separate the heart color from the rest of the piece, using a wet technique to place enamel just where she wanted it:

We found that the hotter the torch, the better. Some pieces needed to be counter-enameled, and some were quite thick and formed enough not to require it.
We need to do this more frequently so we don't forget what we learned each time!!
Fun time and thanks all the ladies who came today!!!!
2 comments:
wow, this was so much more successful than all of our previous attempts. Was it luck, or because Ellen knows what she's doing? What kind of gas did you use? Does it matter?
Sandra we had a lot of failures too... The propane and blazer torches were okay but after everyone left I used a MAPP torch with oxygen and the ease in getting a good result was noteworthy. Firing from below was key also.
Post a Comment