Thursday, October 18, 2012

First Fall Meeting- Silhouette Cameo

Today we met at my house (Dana) so I could show everyone my new toy:
It's a Silhouette Cameo, and you can get one from SilhouetteAmerica.com. It's an electronic cutter, developed for the scrapbooker, but there are other uses...


Here it is cutting some CopprClay, during a class I took this summer.


There's a whole library of images to buy (most only $.99) like this one for a card. Note the cool scalloped edge. It even perforated the fold edge for easy-folding!


You can even buy some adhesive vinyl and make your own glass etchings!


Here I made a multi-layered sticker for my daughter's journal out of self-adhesive foam sheets. This was also a bought pattern.


These hearts started as a bought image, but I modified them to add the loop at the top. They're Shrink Plastic!! Imagine the possibilities...


Here's a fun Halloween image I bought.


Oh, that's right... we're metalsmiths... 
Okay, these images I created myself using the software (upgrade to the Designer Edition- you'll be able to do more...) and then ran the cut paper through the rolling mill. The images elongate due to the rolling mill's action so you need to take that into account when designing. You could use it for creating PNP images, if you didn't have a laser printer. Thoughts about using it for gold foil/Keum Boo were also thrown around. So many uses....

Thanks to everyone who came today: Karen, Ann, Sharon, Mimi, Bodil, Deb, Caroline, Ellen Y., Ellen K.,  & Odaybea.  We also did a bit of Argentium fusing. Sorry I wasn't better at taking any group shots! See you all next time!


Thursday, October 11, 2012

Opal Pendant on Pink Sapphire Necklace


Here is my latest one-of-a-kind necklace.   It's a genuine opal hand polished by Dana Evans.  I love the pink streaks in the center of the stone, and think the bright pink sapphire beads ties it together well.   I added a simple black metal magnetic clasp for fun.    On the back it says  BODIL in braille.

I think I'll keep this one for myself.....

Wednesday, September 5, 2012

Harrison Casting Company

Hello Ladies,

I had such good luck with a new casting company I started using (thanks to a referral from Dana Evans) that I thought I'd share this with you.

Bill Harrison   of Harrison Casting Company   in Rhode Island

Their prices are much cheaper than the company I had been using.

$15 per mold 
10 cents per piece for basic finishing
they use 100% recycled silver
will accept your old scrap gold for a casting

harrisoncastingco@yahoo.com

Always good to save money, AND get a quality product.

Bodil Lund

Thursday, June 14, 2012

Laser Cut Informational Meeting

Today's meeting was at Karina's lovely home and she shared information about laser cutting materials she uses for jewelry-making.

 Thanks to: Karina, Dana (me!), Mimi, Ellen, Jowita, E. J., Caroline (and friend Jeannie), Karen (and friend Ann), Sharon, and Bodil for coming!


This is Karina's 7"x7" piece of acrylic that she had lasercut into a bunch of skulls (some have been removed) from Ponoko.com. They are a firm in New Zealand and their website is designed for people who have Illustrator (vector) files ready to go. Their website is very easy to use and all you have to do is upload one of their templates- they have 3 sizes to choose from- and insert your Illustrator drawings. They also have free downloadable software (if you don't have Illustrator) to create your vector file(s). They cut paper, felt, cardboard, wood, rubber, leather, aluminum, stainless steel and more.


Another option is to use Rodney Shimogawa's company on etsy- customplastic.etsy.com. For a fee, he will take any drawing (even if it's drawn on a napkin!) and will convert it to a vector file for a small labor charge, then will lasercut plastic, rubber or thin wood.  His prices are very good but he is more limited on what he can cut. He cut some 8-1/2"x11" templates for me for stonecutting (see pic above) that were only $8 per sheet. Karina thinks she paid Ponoko $32 or so for her skull sheet. It all depends on how intricate the design is. Karina also uses TAP's Acrylic Cement to glue her pieces together.

Another option is to go to a vector website like vectorstock.com and pay for a vector drawing (there are many that are copyright-free) and then send that to either company to cut. Any modifications to the drawing will still have to be done in Illustrator or similar vector software.

This is a great addition to our "tool kit" as designers! Otherwise, it's hunkering down with a jewelry saw, and we all know that gets old fast!!

Hope to see you all over the summer! Enjoy!


Thursday, May 17, 2012

Polymer Clay Workshop

Always such a nice group of ladies: Mimi, Carolyn, Bodil, Karen, Karina, Lucia, Ellen, Odaybea and Dana (me) at Odaybea's beautiful home in Oakton.


My pictures didn't turn out so well this time- all the ones I took of recent work came out blurry, except for this one below of the polymer clay canes and works-in-progress by Odaybea:


Some of us had never worked with it before, some had. A fun hands-on session. 


See you all in June- last meeting before summer break!

Saturday, April 14, 2012

Please Come By and Visit Us

We'll be showing our work this weekend at the Ratner Museum located in Bethesda, MD

Visit our invite page on Facebook
The Ladysmiths Art Exhibit at The Ratner Museum Facebook page

Just a few of the pieces that will be offered for sale:


Barley Crop Circle
by, Bodil Lund


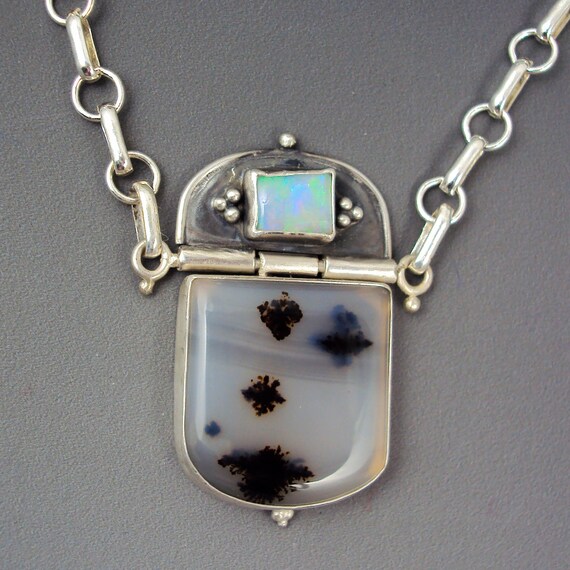
Montana Agate and Opal Necklace
by Dana Evans


Various types of stacking rings
by Carolyn Miller


Pink Quartz and Sapphire Earrings
by Adaybea Morrow

Monday, March 5, 2012

Come see us!!

Friday, January 27, 2012

Fold-forming Meeting

Today's meeting was at Sandra's lovely basement studio- she showed us fold-forming! Thanks to all the amazing ladies who came out on a wet rainy muddy day!


What a nutball! Jowita puts on her "copper lips" made from fold forming 24 ga. copper.


And look what those copper lips became- gorgeous earrings! Lips in the morning, earrings in the afternoon...


Sandra starts the demo by randomly cutting a shape of 24 ga. copper.


After folding, she hammers nice and tight. Pictured l to r: Jowita, Sandra, Bodil, Carolyn, Caroline, Sharon, Ellen and Karen (and me, Dana!)


Confirming the edge with a hammer helps to make the fold's crease stand out once opened up.


Anneal the copper to restore softness, to allow opening up, or to create more folds, or to planish for formwork.


The vise is a nice tool, but not necessary.


This is Sandra's demo piece after folding, confirming, annealing, planishing, and opening.


Jowita's piece in process.


Working on opening a piece- use a knifeblade or steel burnisher.


Ellen's simple but elegant leaf form. To be continued..?


One of Sandra's experimental forms- so elegant and abstract- a bird??


Some of Sandra's silver pieces ready for opening!


An accordion fold done last night by Sandra as an example.

Charles Lewton-Brain has a book called Fold Forming that's amazing- treat yourself to a copy.

Need copper? Try going to the Roofing Center in Alexandria: 5900 Farrington Ave. Contact: Joe Lemen, phone (703)941-6400. Their 12" wide roofing copper (which is 24 ga.) is about $5 a linear foot.

Thanks to all who came, and a big thank you to Sandra!!

Friday, November 18, 2011

Etching Workshop

Today was an awesome etching workshop at Caroline's studio in Falls Church:

Thanks to (l to r): Sharon, Ellen, Caroline, Sandra and Odaybea for coming!! (and me, Dana!)


Odaybea etched her sterling silver cuff using a couple of PNP images which she ironed on, then she painted on a layer using an oil-based paint pen, and carved out some text. A scribe or the end of a file work great for carving out the resist.


Here is a progress shot of Odaybea's cuff.


Sandra created a sheet of images, with several layers of etched images- here 1/2 is done, 1/2 is in progress. Nail polish also makes a great resist. She used Rio Grande's new silver/brass bimetal- also known as silver filled. The possibility exists to etch through one side, revealing the alternate material. Gotta try that!


Ellen's etched pieces were created with PNP paper with the exception of the bottom right starburst which was created with a paint pen resist.


Ellen's Greek Gods turned out awesome.


Sharon's pieces were created with PNP paper. Can't you see some soldered-on stone settings in their future??


Dana's top right piece was created by utilizing nail stamps, bottom. The above left piece is a work-in-progress.


Dana's pieces using nail stamps and PNP paper.


Some recent work came in too! Here's a peek at Ellen's beautiful pieces- some still in progress.


Sharon's recent pieces are about to make their debut appearance in her NEW etsy shop- best of luck Sharon!!

I missed taking Caroline's etchings! Maybe we'll post them once they're all done- everyone send me photos of these pieces once you've used/finished them!!

Thursday, September 22, 2011

Meeting at the Ratner Museum

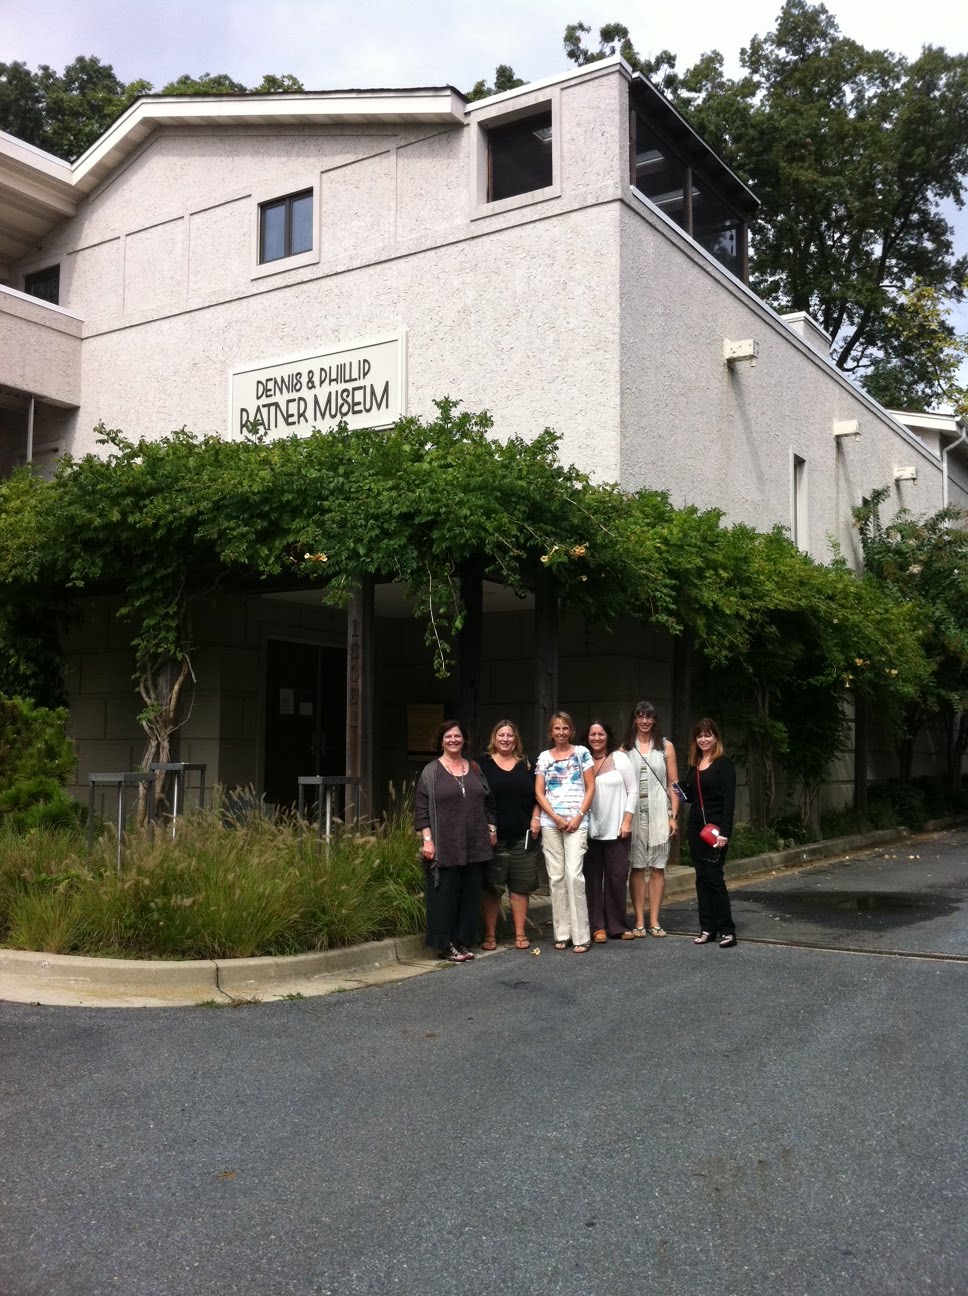
This is a pic of the Ratner Museum in Bethesda Maryland. Very nice! Ellen K's family owns this beautiful gem and we were lucky to get an "inside" tour!

Here we are in front: Mimi, Sharon, Bodil, Sandra, Karen, and Ellen K. (plus me, Dana)


Another great shot of us!


Ellen treated us to a overview of dentistry tools she uses in her profession but also in her metalsmithing!


Here we are meeting in the carriage house of the Ratner Museum.


The first floor of the Ratner Museum. A large square area that showcases 4 artists per month. The upper level is the work of Phillip Ratner.