 I made these earrings (a tad under 1" wide) in part to demonstrate keum-boo to my students at the Lorton Workhouse. They loved the technique and I liked how the earrings came out. The ovals were traced onto sterling sheet from a plastic template (of which I have a dozen or more- very helpful for getting 2 earrings EXACTLY the same size) and then I edged them in brass square wire (to pick up the gold color from the keum-boo foil) and with a sterling round wire inset. I like the detail this framing gives them. I used some small but fiery opals- one cracked as I set it because it was so thin- yikes! Fortunately I had more! I like the earwire attachments, and they oxidized in liver of sulfur nicely too. The earring on the left I screwed up a bit on- I layered 3 triangles of gold foil in the center, but one got misplaced as I set it and stuck instantly as the earring was already laying on the hot plate (note to self- set the foil BEFORE setting piece on hot plate). So you can see especially on the bottom how there are 2 points. Ah well- handmade, right? ;) Dana
Sunday, February 27, 2011
Keum Boo Earrings
I made these earrings (a tad under 1" wide) in part to demonstrate keum-boo to my students at the Lorton Workhouse. They loved the technique and I liked how the earrings came out. The ovals were traced onto sterling sheet from a plastic template (of which I have a dozen or more- very helpful for getting 2 earrings EXACTLY the same size) and then I edged them in brass square wire (to pick up the gold color from the keum-boo foil) and with a sterling round wire inset. I like the detail this framing gives them. I used some small but fiery opals- one cracked as I set it because it was so thin- yikes! Fortunately I had more! I like the earwire attachments, and they oxidized in liver of sulfur nicely too. The earring on the left I screwed up a bit on- I layered 3 triangles of gold foil in the center, but one got misplaced as I set it and stuck instantly as the earring was already laying on the hot plate (note to self- set the foil BEFORE setting piece on hot plate). So you can see especially on the bottom how there are 2 points. Ah well- handmade, right? ;) Dana
Friday, February 25, 2011
Gold Bangle for Customer
 Just finished this custom piece. Melted old gold and shaped into 12 gauge wire (that took a long time), made the bezels, and set the pink tourmalines. I'm pleased with the look and know my customer will be also. She is very specific about what she wants and is a great designer. I've made about 6 other pieces for her during the past couple of years. A fun and challenging project!
Tuesday, February 22, 2011
Staying Busy
and keeping the color alive in my home studio during these cold days...these are all at different areas of progression...
(it's me Care)

(it's me Care)

I'm enjoying the feel of the saw as it easily makes its way through metal, and around bends and curves...must be a tactile thing.
Friday, February 18, 2011
New Earrings Done
 These long earrings took me 3 sessions to complete. I got the idea from some curtains in my house! I like how they turned out. I had to re-do one of the prehnite bezels because when I was soldering on the goldfilled hook, the bezel melted- oops! The bezels for the opals took a while to make and put some gouges in my fingertips- so small! I like the small detailed work against the smooth expanse of the stones. I also like the mixed-metal look. They're long- 2-1/4" without earwire, and weigh 8 grams each (a nickel is 5 grams). I'd had the stones for over a year and finally thought of a way to put them to good use.
Thursday, February 17, 2011
Earring Challenge


I am loving these design challenges! here's the latest:
Each of us was given an 8" strip of off-white, 1" wide aluminum (e.g. Levelor) window blinds. Like the second of the above photos.
The assignment: make a pair of earrings, using all of the material. Other metals, plastic, and color were permissible additions but nothing else. I decided to add sterling silver spacers and earwires but no color (I could use some white earrings) and no plastic. The first photo (above) is what I came up with.
Made this Yesterday
it's funny how life gets in the way of work, just getting photos of it this morning and listing it later...what do you ladies think of it sitting atop a druzy which is on a vintage map? I think it might be too much...(yes real opinions please) Going to list it, but not on the druzy, but oh if you could hold and see how brilliant the purple druzy is you'd put a fresh made ring on top too! (I think you would) Lately I've been craving color, so I've been making more stone set items and less kinetic ones.
(it's me, Care) :-)

(it's me, Care) :-)

Wednesday, February 16, 2011
Inexpensive tabletop lights
I've been trolling around the Internet looking for inexpensive lights like the ones Dana brought to the Ladysmiths meeting last week. She has a nice set of tabletop tripod lamps with wide shades that accommodate daylight-balance fluorescent trumpet bulbs, but she couldn't remember where she got them. I found a good source: CowboyStudio. Their products get good reviews and their prices are terrific. You can go to their website, but the prices there are more expensive than the prices at their Amazon store. I just ordered a 2-light kit (2 30-watt 5000K daylight CFL bulbs, 2 mini light stands, and 2 aluminum reflectors with sockets) for $39.49 plus $7.99 shipping (on their site, $49.63 plus shipping). At that price, it's a great accessory for your homemade light box.
http://www.amazon.com/CowboyStudio-Photography-Table-Studio-Lighting/dp/B002SOBPH8/ref=sr_1_22?ie=UTF8&qid=1297894176&sr=8-22
Sharon
http://www.amazon.com/CowboyStudio-Photography-Table-Studio-Lighting/dp/B002SOBPH8/ref=sr_1_22?ie=UTF8&qid=1297894176&sr=8-22
Sharon
Sunday, February 13, 2011
Lightbox/Photography Get-Together
February's meeting was at Caroline's house and we started by laying some pictures of our work on a table and talking briefly about some issues we were currently having with photography. We then moved right in to setting up a prototype PVC lightbox frame and making a bunch of them at our own desired sizes.

 This was the prototype I constructed at home and brought to the meeting. (See link for instructions to make your own PVC lightbox) I bought a cheap pillowcase and cut it so it opened to be a long skinny piece of fabric to diffuse the lights. ** Make sure you use daylight spectrum bulbs. Incandescent bulbs are too yellow. Lights should be positioned in front and on the sides of the object. A third light could be used on top. Photographing silver can be problematic due to it's inherent mirror-like quality. Sometimes using less light is better! Opals can also be tricky- I've found less light is best, with a smaller less-intense light in the front to bring out the fire.
 In order to hang earrings on a rod, use 2 equal lengths of chain hung on the frame and then insert a dowel (I painted it black in the center with a Sharpie!) between them. Voila! To hang a necklace, adapt this to possibly include clips or some other attachment/hanging device.
 This ring was photographed in the PVC lightbox, above. Any camera with a macro lens will work. Odaybea's camera was SO NICE (see last posting) and took much better pictures than my cheapie camera! But good results can be had with any camera! See link for background paper sources. The smaller graduated paper can be used for a smaller lightbox. Larger pieces for larger lightboxes- ideal for large necklaces that need to be laid out. This background paper (grey to black) is very matte and absorbs light, so there's no distracting reflections. Be on the lookout for dust.
 This is Sandra's lightbox frame (upside down) after cutting pipe lengths and inserting connectors. Notice the T-shaped connectors are all facing inwards, then the corner connectors attach into the ends of the T's. It's best to construct it upside down, doing the top first, before adding the legs.
 This is a close-up of Sharon's ring taken in the lightbox at Caroline's house with my cheapie camera. Good detail and diffused light quality. Sometimes placing your hand in an appropriate position can help eliminate "hot-spots" (as seen on upper right of ring). Using a camera tripod can free up your hands to do the appropriate amount of "blocking" necessary.
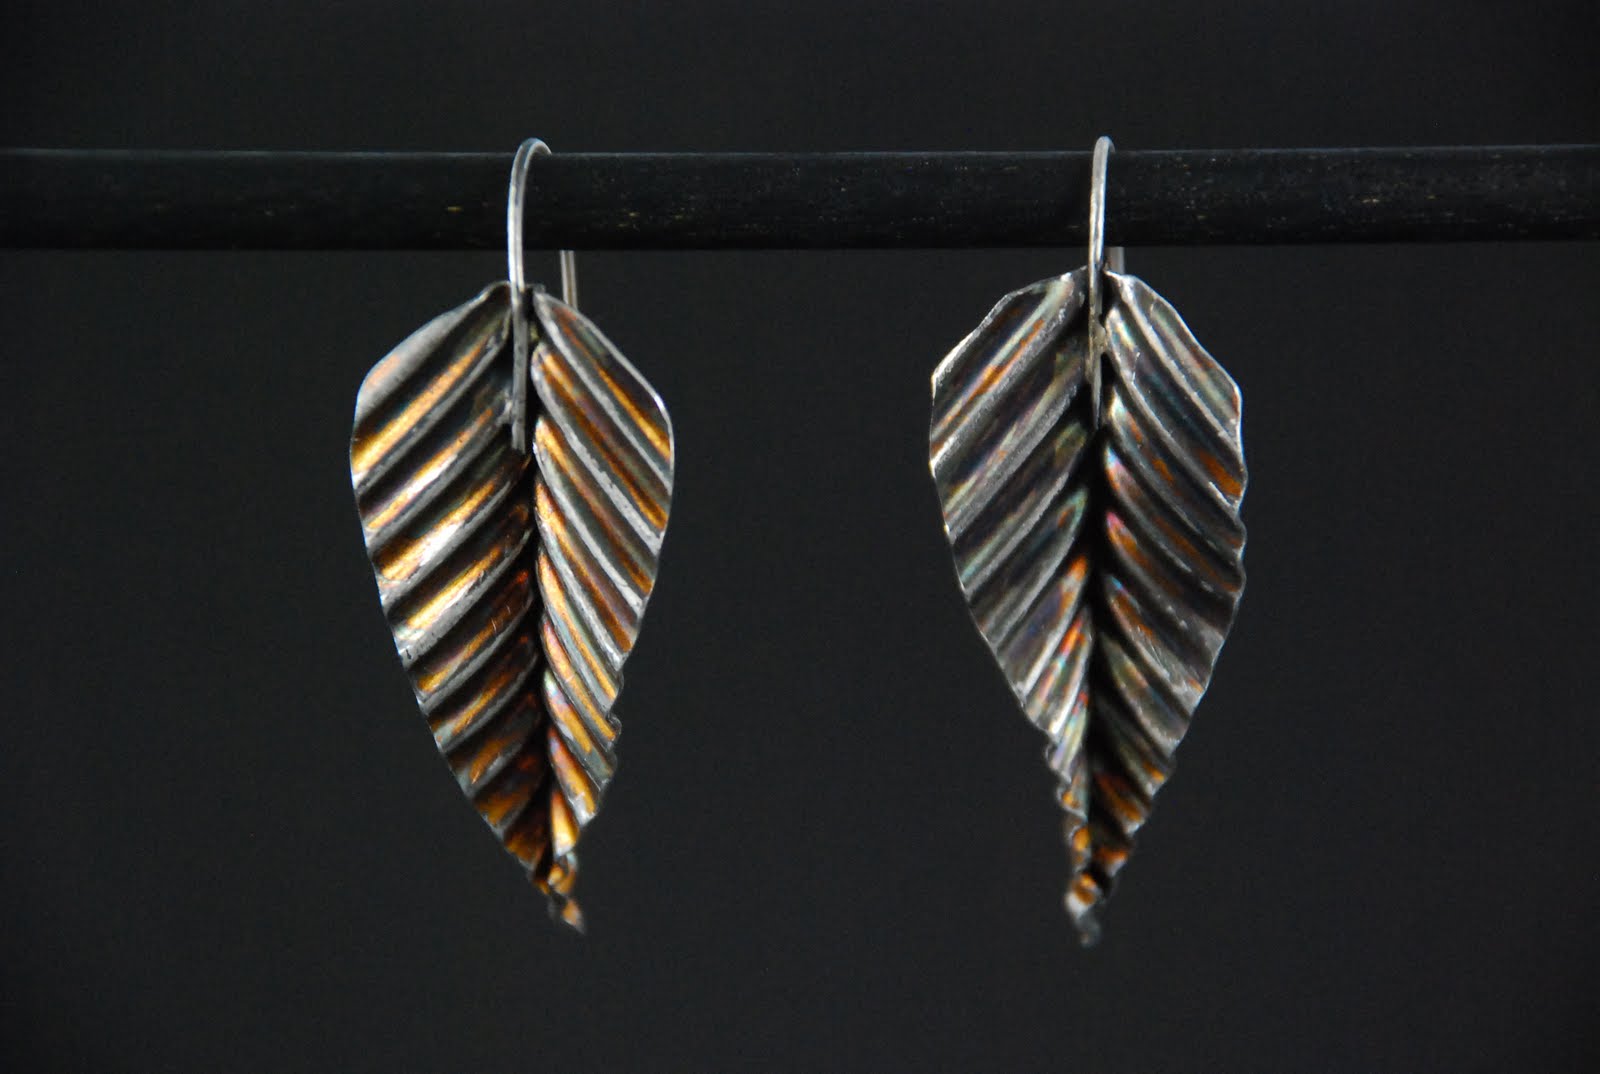
 Sandra's fold-formed leaf earrings hung on a dowel rod in the lightbox.

 This was the prototype I constructed at home and brought to the meeting. (See link for instructions to make your own PVC lightbox) I bought a cheap pillowcase and cut it so it opened to be a long skinny piece of fabric to diffuse the lights. ** Make sure you use daylight spectrum bulbs. Incandescent bulbs are too yellow. Lights should be positioned in front and on the sides of the object. A third light could be used on top. Photographing silver can be problematic due to it's inherent mirror-like quality. Sometimes using less light is better! Opals can also be tricky- I've found less light is best, with a smaller less-intense light in the front to bring out the fire.
 In order to hang earrings on a rod, use 2 equal lengths of chain hung on the frame and then insert a dowel (I painted it black in the center with a Sharpie!) between them. Voila! To hang a necklace, adapt this to possibly include clips or some other attachment/hanging device.
 This ring was photographed in the PVC lightbox, above. Any camera with a macro lens will work. Odaybea's camera was SO NICE (see last posting) and took much better pictures than my cheapie camera! But good results can be had with any camera! See link for background paper sources. The smaller graduated paper can be used for a smaller lightbox. Larger pieces for larger lightboxes- ideal for large necklaces that need to be laid out. This background paper (grey to black) is very matte and absorbs light, so there's no distracting reflections. Be on the lookout for dust.
 This is Sandra's lightbox frame (upside down) after cutting pipe lengths and inserting connectors. Notice the T-shaped connectors are all facing inwards, then the corner connectors attach into the ends of the T's. It's best to construct it upside down, doing the top first, before adding the legs.
 This is a close-up of Sharon's ring taken in the lightbox at Caroline's house with my cheapie camera. Good detail and diffused light quality. Sometimes placing your hand in an appropriate position can help eliminate "hot-spots" (as seen on upper right of ring). Using a camera tripod can free up your hands to do the appropriate amount of "blocking" necessary.
 Sandra's fold-formed leaf earrings hung on a dowel rod in the lightbox.
 Next meeting- how to get from photo shoot to Photoshop!
Saturday, February 12, 2011
Trumpet light bulbs
Here is a link to where you can buy the trumpet light bulbs... www.store.tabletopstudio-store.com/spiral.html



Subscribe to:
Posts (Atom)